It was almost exactly 10 years ago in December 2013 that we wrote our first blog post about detecting CryptoLocker, which was the first sophisticated Ransomware attack of its kind back then. BTW, 2013 was the year of the Boston Marathon bombing, Edward Snowden leaking secret NSA information, Syrians fleeing their home country and Nelson Mandela passing away.
While it was somewhat unclear at the time whether Ransomware was here to stay, 10 years later we know that – unfortunately – CryptoLocker was just a prelude of many more bad things to come. Cryptolocker was a pilot episode, and we’ve been enjoying a never-ending Malware soap opera since then.
With the help of cryptocurrency among other things, Ransomware has turned into a lucrative business model, generating some 1 billion in ransomware payments in 2023. In other words, it pays to encrypt! Cha-Ching! So we can all agree that Ransomware will be here to stay as long as networks remain insecure and companies are willing to pay.

But despite its bad reputation, Ransomware does have one positive aspect – it will let you know that it’s there! And that’s in stark contrast to other Malware that often remains undetected within a network for long periods. Malware often lurks in the shadows and either waits for commands from its shadow master or slowly exfiltrates classified data – e.g. from a defense contractor. Nation states seem to utilize Malware both to plant time bombs as well as exfiltrate trade secrets. After all, why waste precious time with R&D when you can just download everything?
Many still don’t fully understand how Malware and Ransomware work. How does it get in? What does it do once it gets in? Can I still detect it after it established itself? Is my company a potential target? But whether it’s Ransomware or Malware (I will refer to them collectively as Malsomware here), it needs to be blocked or – at the very least detected as quickly as possible.
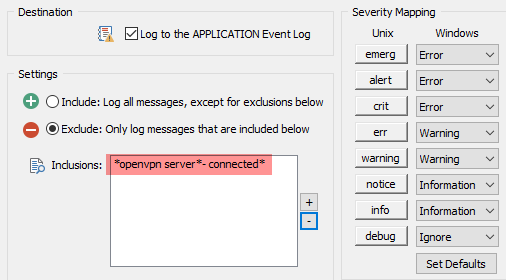
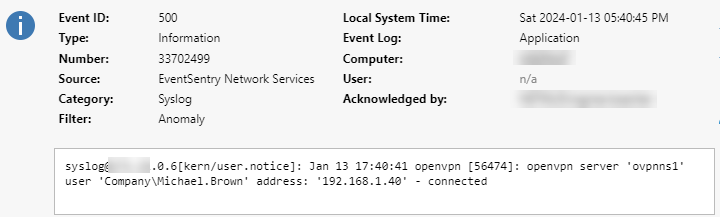
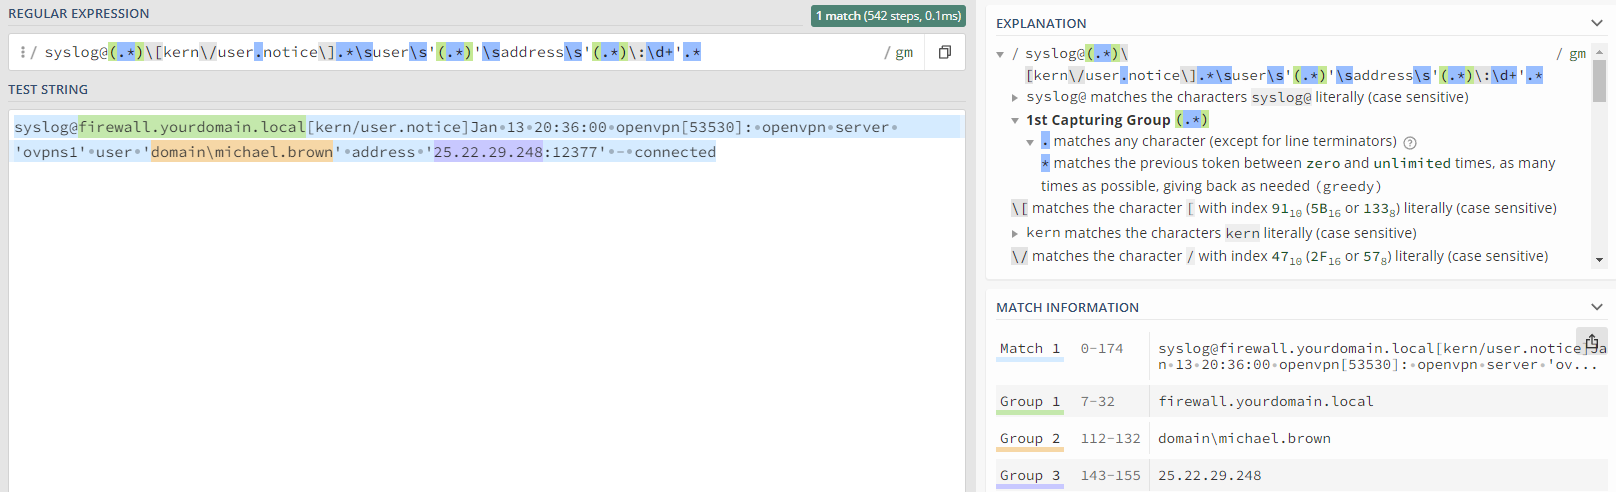
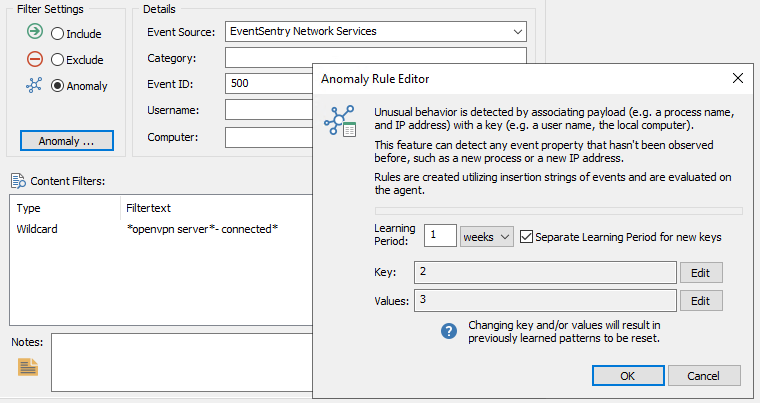
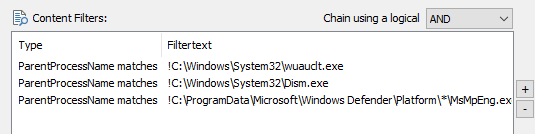
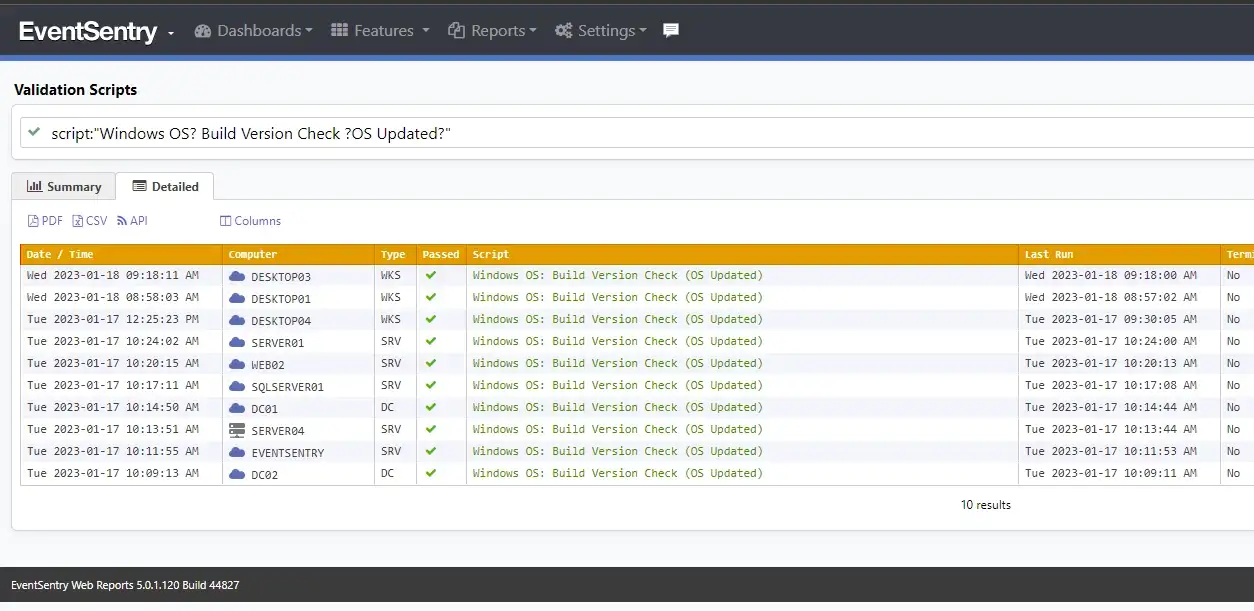
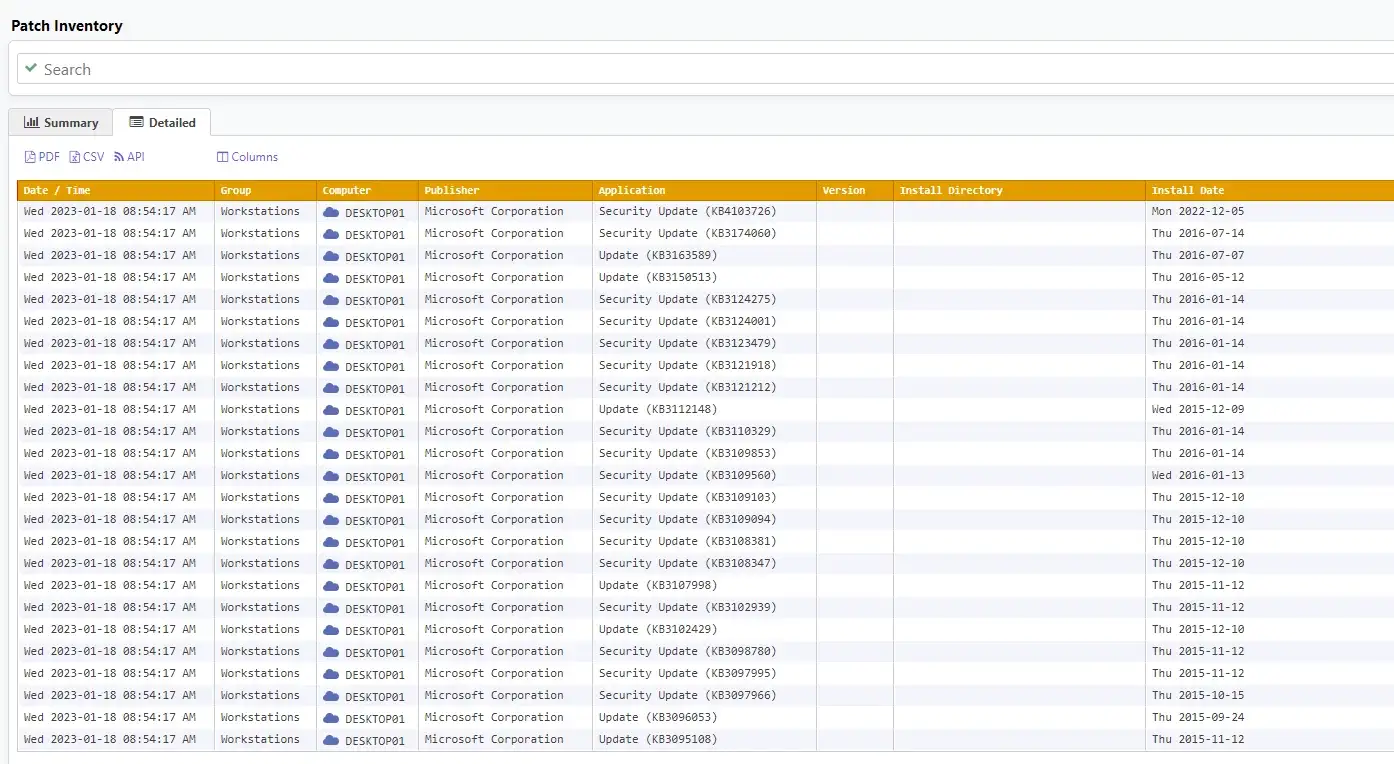
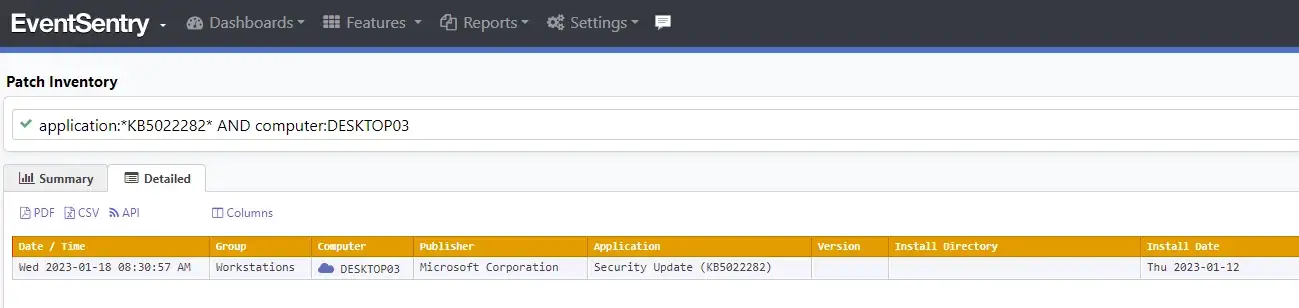
Over the next few weeks, we’ll be posting a number of articles that explain Malsomware and how EventSentry can help detect and uncover these intruders. We’ll start with a simple diagram that simplifies the journey of your average infection. The good news for EventSentry (v5.1) users, is that you can reduce the risk of Malsomware infections in every stage listed below, starting with the exploitation stage.
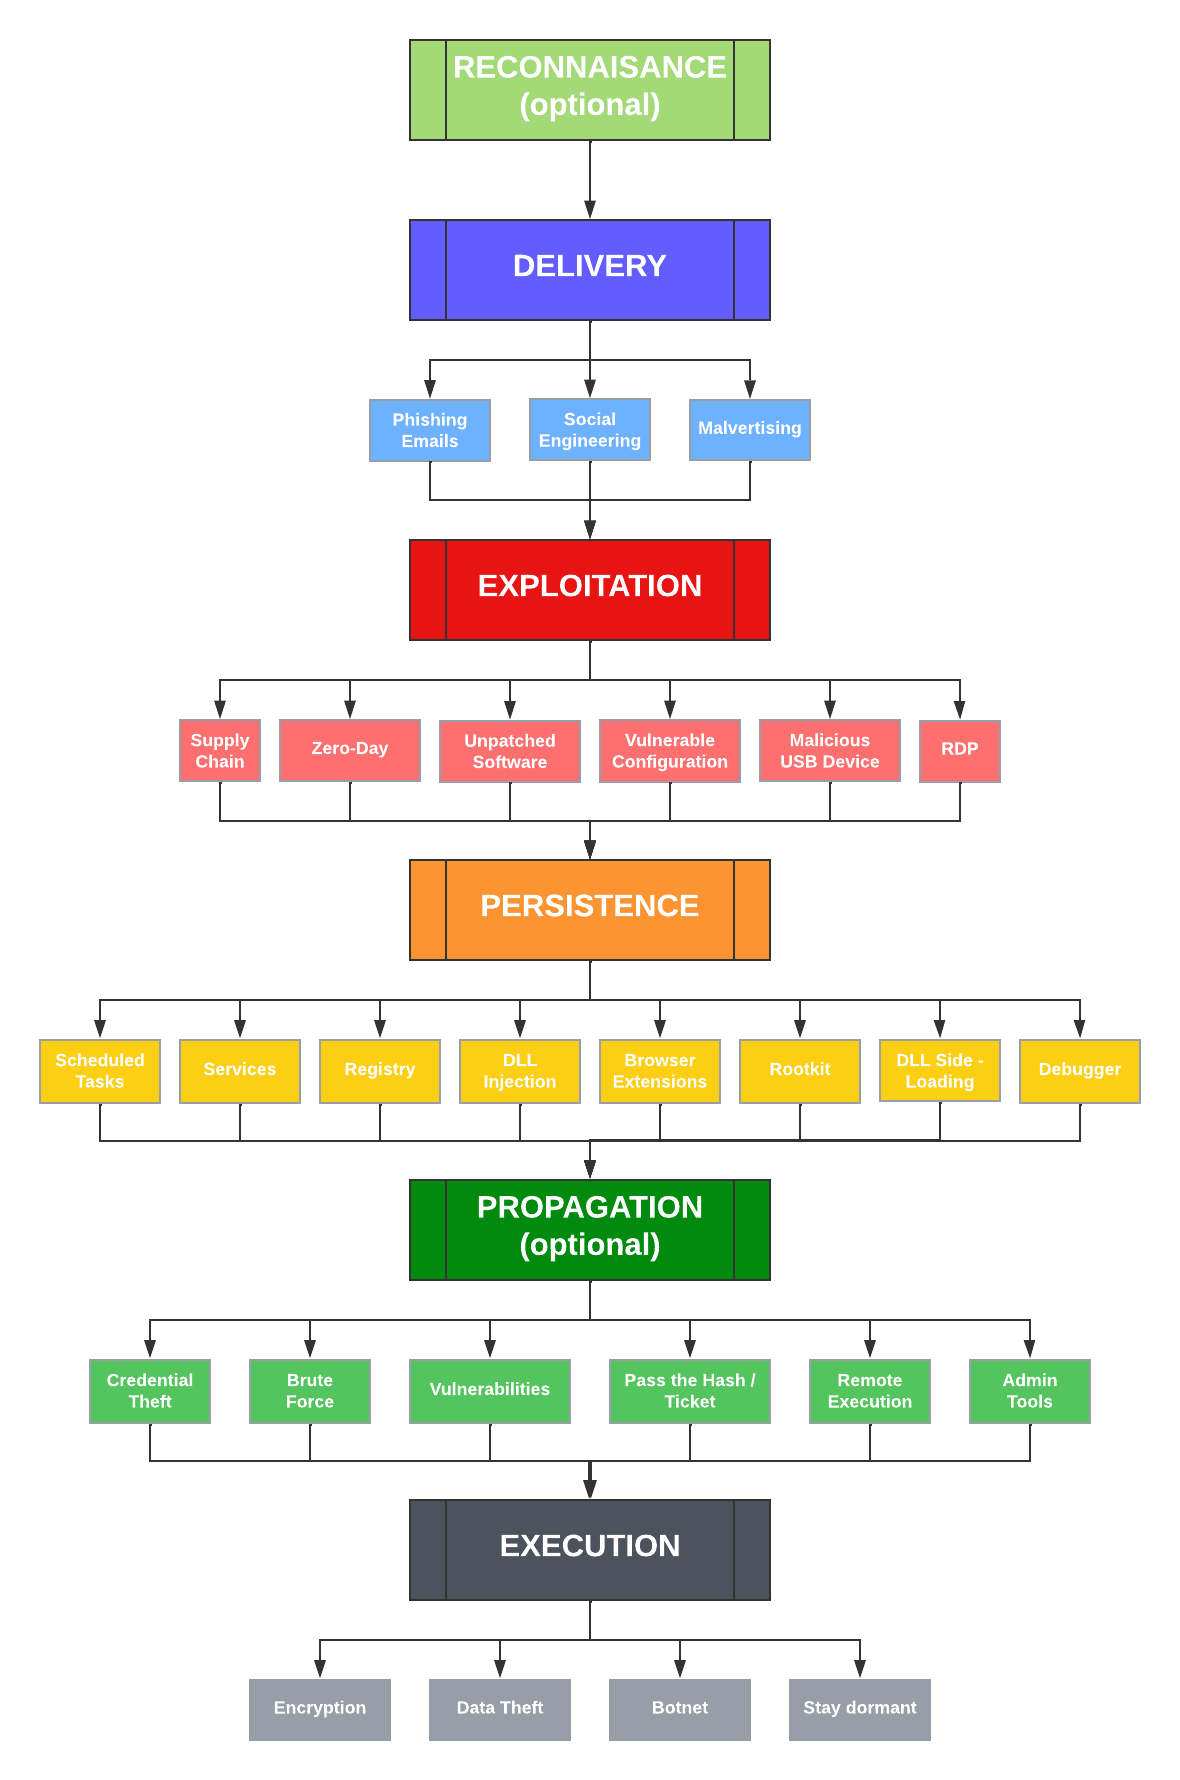
Reconnaissance is often the first step when preparing an attack on a target, but since it’s a manual process, it’s usually only done for high-value, targeted attacks. And even though these attacks are likely rare, it’s still a good idea to educate key staff on the risk and limit the public exposure of personal data. Facebook, LinkedIn, WhatsApp, and other social media sites & apps are all extremely valuable resources for attackers and help with social engineering attacks. Don’t underestimate the risk – doing research on a company and its individuals doesn’t take as many resources as one might think, and let’s not forget that our adversaries likely outnumber us significantly. Bottom Line: If your organization has valuable data or a lot of funds, then you might end up on a radar sooner than you’d like.
But when discussing risk – one important factor is often overlooked: Our own risk assessment for malsomware infections. How we (and collectively our organization) assess our own risk strongly affects how seriously we take threats, and how many resources we subsequently invest in defenses – say cyber security measures. This is human nature and makes perfect sense: If you don’t have the funds for a security system for your house (alarm, new locks, cameras, …) then you are likely to convince yourself that you don’t need this, and you live in a safe neighborhood – even if the data says otherwise.
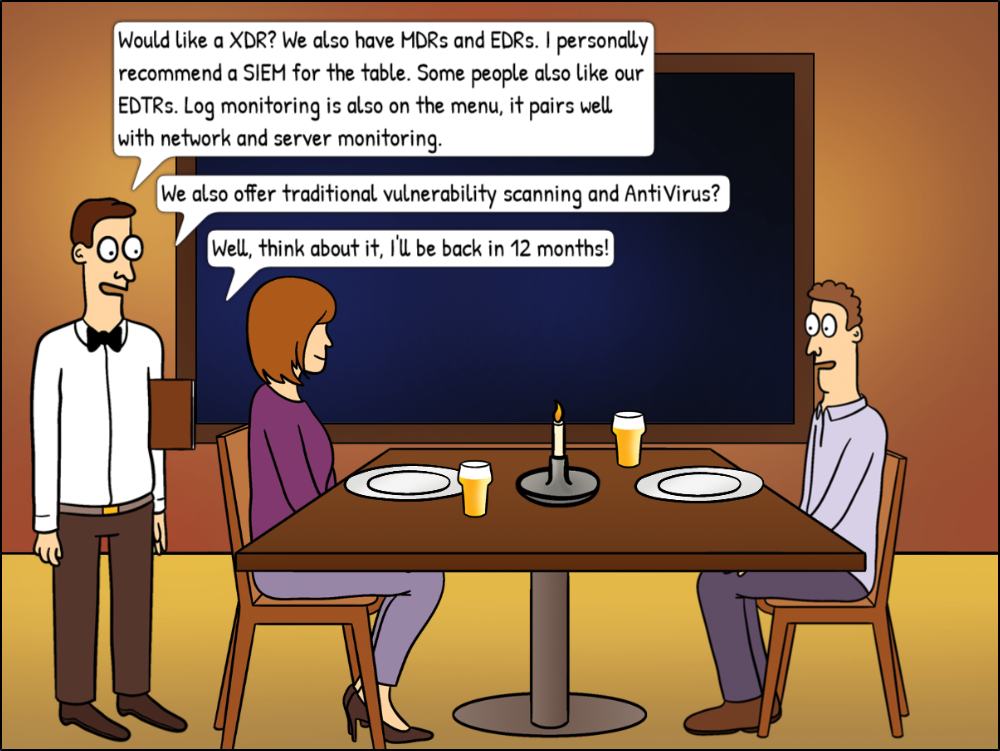
Human psychology aside, after ten years of Ransomware one would think that all organizations should be aware of the elevated risk of cyber attacks, right? What’s missing in this equation, however, is that people and organizations usually don’t like to invest in projects that don’t yield an immediate ROI. As such, risk mitigation that is both expensive and complicated might backfire – and complicated it is. Do you get a SIEM? An XDR? MDR? EDR? Network Monitoring? Do you get multiple ones? Which one is the best? Which one fits your budget? It can take organizations months of meetings, quotes, evaluations & finally an implementation before an effective mitigation system is finally in place. Unfortunately for them, Malware actors don’t usually wait until you are ready & prepared to take them on.
Malware actors are casting a wide net – and most organizations today are at risk. If you’re managing public infrastructure or any government office, you’re at risk. But you’re also at risk if you’re working for a boring government agency, or just working *with* a government agency. Because attackers might target your “boring” or “insignificant” organization so they can later infiltrate the more exciting government network. Defense contractors are the prime example and the reason why CMMC has been created. Yes, your organization might create bolts, lights, or metal parts. But if you have a relationship or connection with a more valuable contractor, then hacking your network might help the attacker get into that more valuable target. Is your company generating significant revenue and profits? You’re obviously at risk for Ransomware. And so the list goes on – even if you work for a 10-person marketing company, you’re at risk for identity theft, botnets, crypto miners, and so forth.
In summary, while the risk level (and appropriate countermeasures) differs between different companies, every Internet-facing company is exposed to some level of risk. Stay tuned to learn more about how Malsomware attacks and how you can protect your network. Oh, and if you’re in charge of a Windows network, then head to system32.eventsentry.com right now and compare the recommended audit settings with the ones in your network. It’s easy, fast, and free and lays the groundwork for a comprehensive security solution down the road. You’re welcome.